Atavism Online – UMA Installation
UMA 2.10+
In order to implement UMA into your Atavism project you have to follow few steps:
1. Import default UMA 2 (Unity Multipurpose Avatar) available on the Unity Asset Store.
2. Import Atavism_{version}_UMA_2_10 integration package which is also accessible at your apanel.
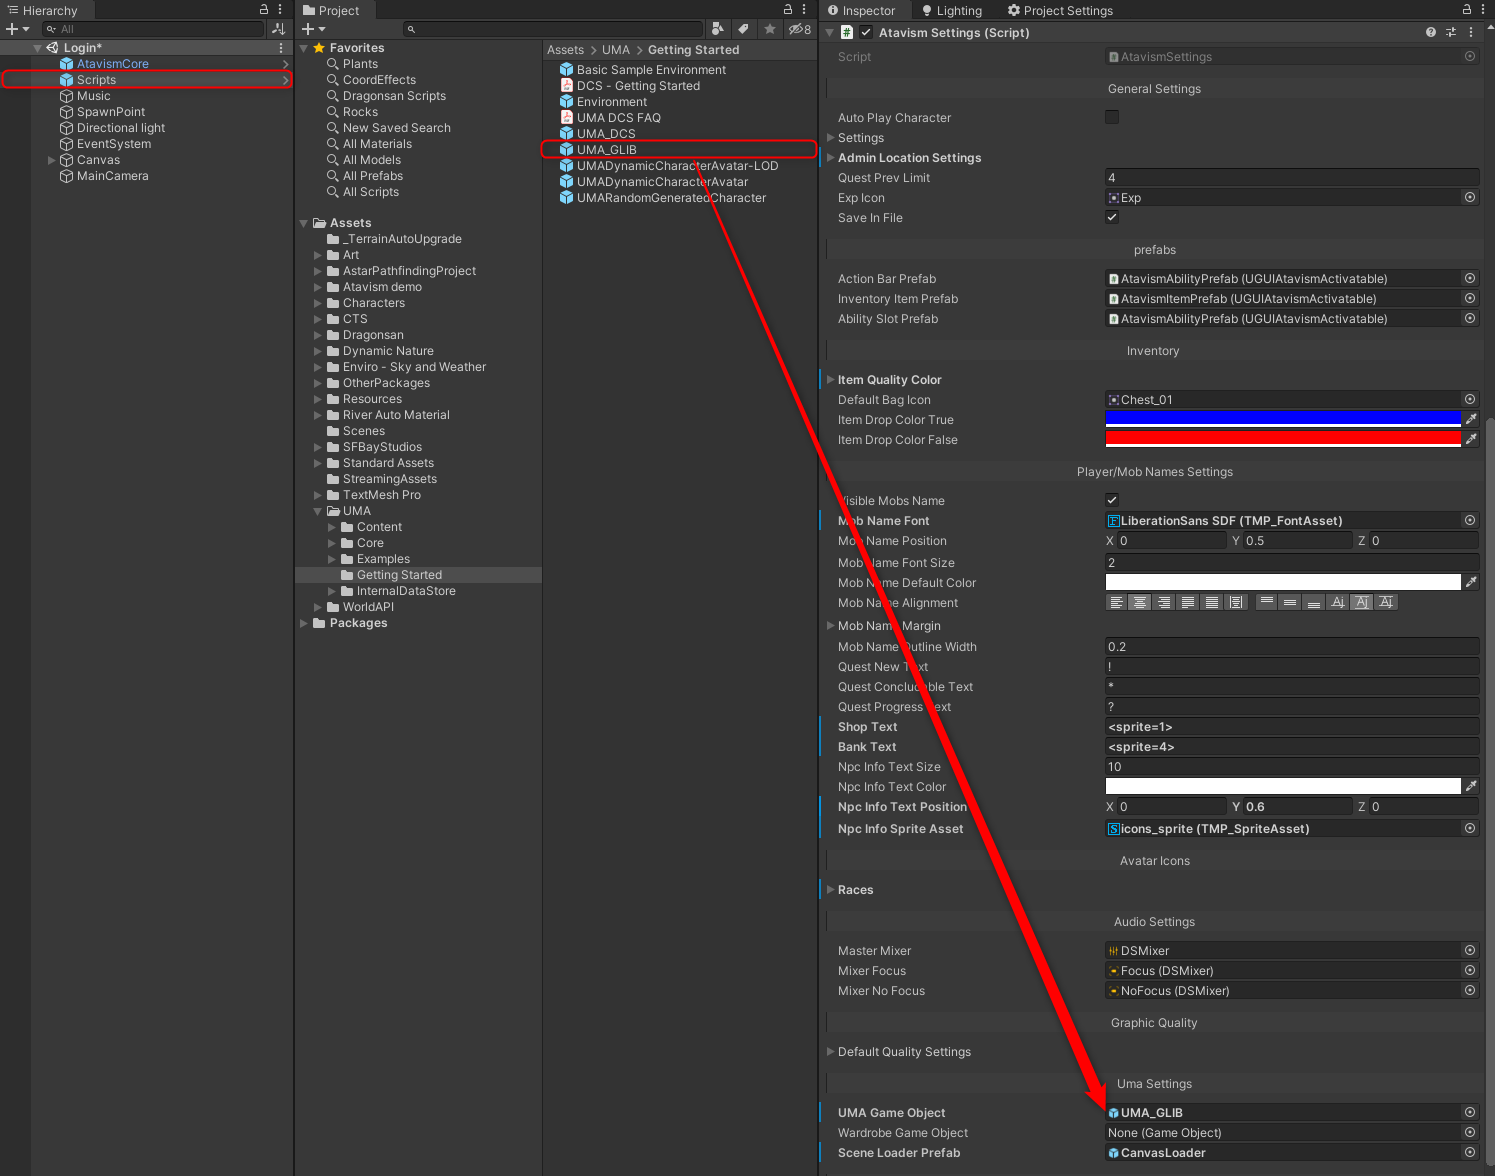
3. Open Login scene and find Scripts object, then drag UMA_GLIB prefab from Assets/Scripts/UMA to AtavismSettings component into UMA Game Object variable.
UMA 2.9 and below
In order to implement UMA into your Atavism project you have to follow few steps:
1. Import default UMA 2 (Unity Multipurpose Avatar) available on the Apanel.
2. Import Atavism_{version}_UMA integration package which is also accessible at your apanel.
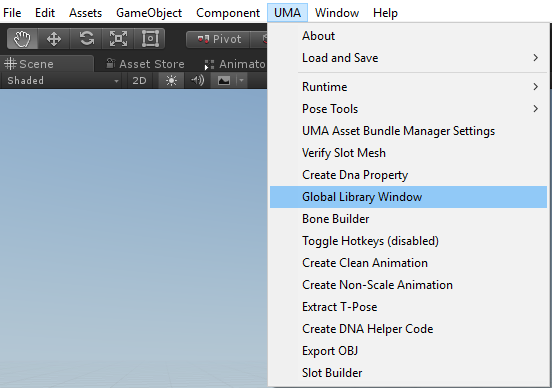
3. In Unity Editor from top menu open: UMA -> Global Library Window. For Atavism 2019.1.2+ this step is obsolete.
4. Drag Assets/Atavism Objects/UMAContent directory into the “Drag Indexable Assets here…” window. For Atavism 2019.1.2+ this step is obsolete.
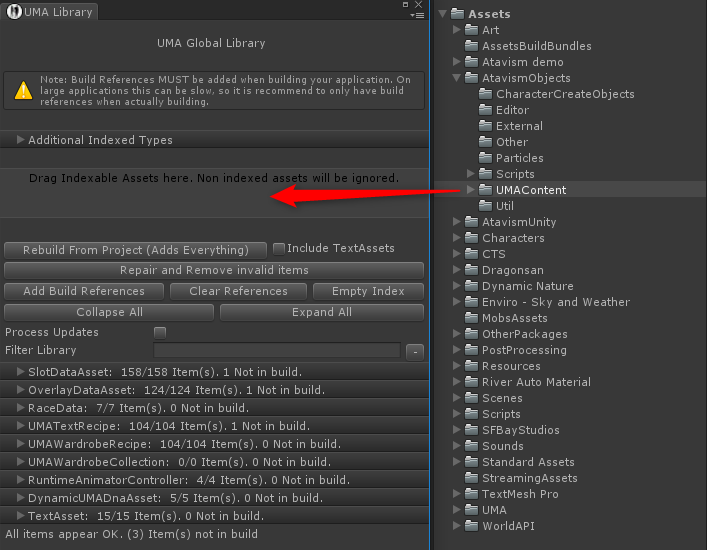
If you are using Atavism 2019.1+ you should drag directory Assets/Dragonsan/AtavismObjects/UMA and Assets/Dragonsan/AtavismObjects/UMAContent. For Atavism 2019.1.2+ this step is obsolete.
5. Open Login scene and find Scripts object, then drag UMA_DCS prefab from Assets/Scripts/UMA to AtavismSettings component into UMA Game Object variable.
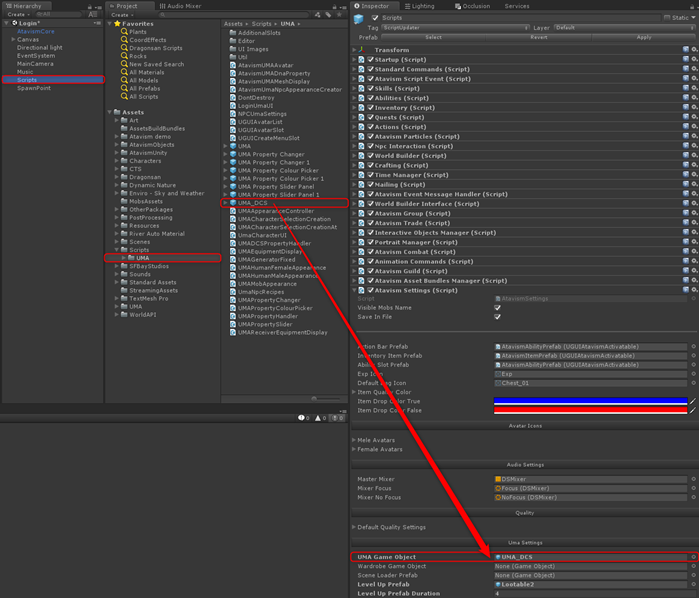
If you are using Atavism 2019.1+ you should drag UMA_DCS prefab from the directory Assets/Dragonsan/AtavismObjects/UMA. For Atavism 2019.1.2+ this step is obsolete.
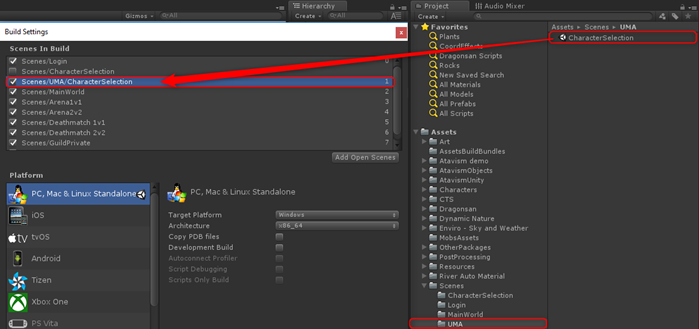
6. In the player build section replace previously added CharacterSelection scene with the one from Assets/Scenes/UMA/CharacterSelection
If you are using Atavism 2019.1+ you should drag your character selection scene from the directory Assets/Dragonsan/Scenes/UMA/ForDemo. For Atavism 2019.1.2+ this step is obsolete.